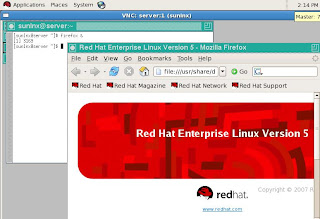
Objective: To create VNC server and make this accessible for the remote client.
Description:
Virtual Network Computing (VNC) is a graphical desktop sharing system.
VNC is platform-independent -a VNC viewer on one operating system may connect to a VNC server on the same or any other operating system.
Environment: Redhat Linux 5.0 32-bit.
1. VNC server
Hostname: server
IP address:192.168.56.99
2. Remote user
IP address:192.168.56.102
Hostname:appserver
Plan:
- Install and verify "vnc" packages.
- Create your VNC users.
- Set your users' VNC passwords.
- Edit the server configuration.
- Create and customize xstartup scripts.
- Start the VNC service.
- Test VNC user.
1. Verify install both the packges of VNC server.
[root@server ~]# rpm -qa vnc*
Install VNC server and client package.
[root@server ~]# yum install -y vnc*
[root@server ~]# yum list vnc*
Installed Packages
vnc.i386 4.1.2-9.el5 installed
vnc-server.i386 4.1.2-9.el5 installed
2. Create VNC user.
[root@server ~]# useradd sunlnx
[root@server ~]# passwd sunlnx
3. Edit VNC server configurations.
Append the below lines in config file(/etc/sysconfig/vncservers)
VNCSERVERS="1:sunlnx"
VNCSERVERARGS[1]="-geometry 640x480"
[root@server ~]# tail -2 /etc/sysconfig/vncservers
VNCSERVERS="1:sunlnx"
VNCSERVERARGS[1]="-geometry 640x480"
4. Need to create default startup scripts.
[root@server ~]# vncserver
You will require a password to access your desktops.
Password:
Verify:
New 'server:1 (root)' desktop is server:1
Creating default startup script /root/.vnc/xstartup
Starting applications specified in /root/.vnc/xstartup
Log file is /root/.vnc/server:1.log
This would have created .vnc directory in $HOME.
[root@server ~]# ls -ld .vnc/
drwxr-xr-x 2 root root 4096 Jul 14 13:40 .vnc/
[root@server ~]# ls .vnc/
passwd server:1.log server:1.pid xstartup
5. Create xstartup scripts.
We will create the xstartup scripts by starting and stopping the vncserver as root.
[root@server ~]# service vncserver start
Starting VNC server: 1:sunlnx
New 'server:1 (sunlnx)' desktop is server:1
Starting applications specified in /home/sunlnx/.vnc/xstartup
Log file is /home/sunlnx/.vnc/server:1.log
[ OK ]
[root@server ~]# service vncserver stop
Shutting down VNC server: 1:sunlnx [ OK ]
[root@server ~]#
6. VNC server listens on port 5901.
[root@server ~]# netstat -nalt
tcp 0 0 0.0.0.0:5901 0.0.0.0:* LISTEN
7. Install "vncviewer" on the remoted system, and connect to the VNC server.
Below are the snaps.
Objective successful.


